Vinyl Restoration  Digitising Your Vinyl Record Collection

Planning

"If a job's worth doing, it's worth doing it well" applies to digitising vinyls.  However, doing it well is an extremely time-consuming process.  Obviously, you have to record the tracks in real time, but the time spent digitally editing the wave files to remove scratches is usually far more significant.  I had about 150 singles, 400 - 500 LPs, inheriting another 100 - 200 when my mother died, and after some years I have only just finished.  If you have any quantity, you need to think about reducing the workload.

Popular music, in particular, dates very quickly, and a lot of it is very similar and formulaic.  Generally, only a small percentage from any era is worth keeping.  Even allowing for the fact that my era  late 60s/early 70s  was a particularly creative time, the number of pop albums that I want to keep in their entirety is low.  Realising this more than halved my problem.  Accordingly …

  1. Listen critically through the entire collection, and classify them as to whether:
  2. Hopefully this will reduce those to be digitised to relatively small numbers mainly of individual tracks plus the odd deleted entire LP  Concentrate your digitising efforts on these that you can't obtain any other way.

What You Need

Procedure

  1. Ensure that the deck is well set up  appropriately connected, appropriately earthed with no mains hum, correct and accurate turntable speed(s), good quality stylus, balanced arm, correct stylus pressure, correct bias compensation, etc.
  2. Clean the stylus.
  3. Clean the record using a cleaning cloth or other such method.  Do NOT use a machine yet.
  4. Record both sides of the vinyl as wave files (*.wav), usually about 420MB.  Set levels such that the loudest signal excluding scratches almost fills the available volume range without clipping.  Afterwards, check recording peaks for clipping, and if necessary re-record with lower levels.  Avoiding writing with the vinyl surface as background, note on a corner of the inner sleeve, or on a sticky note attached to it, the final levels and where the loudest non-scratch peaks are on the album.
  5. If you have a cleaning machine, repeat 2 - 4, using it in 3.  Choose the best recording to work with, but do not delete the other one until work on the album is finished.
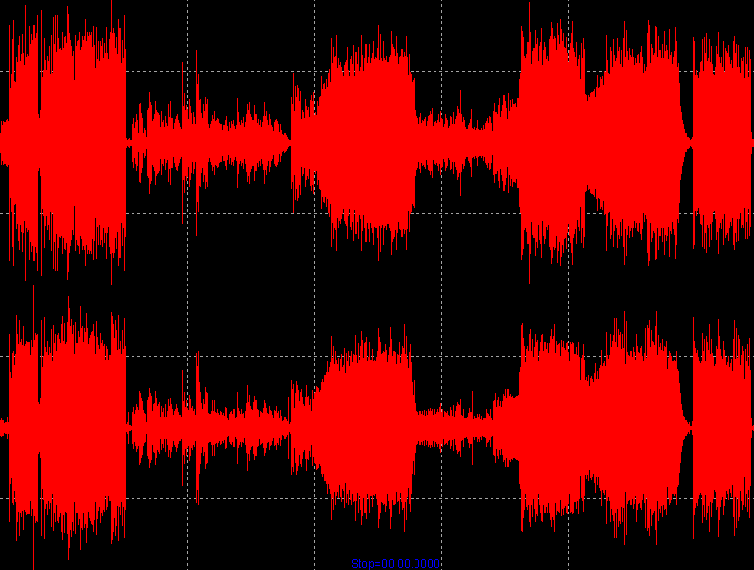
  6. Especially for the first few album sides you record, ensure that you listen critically to them in their entirety before moving on and recording others.  You need to ensure that there are no breaks caused by scheduled computer tasks such as screen-savers blanking the screen, automatic operating-system and program updates, etc  if necessary for the duration, set the screen saver timeout to 40 minutes or more, and set updates to be performed manually (and don't forget to do them).  Hopefully, if all has gone well, you now have a recording of each side looking something like (for a stereo vinyl): A recording of one side of an LP loaded into digital sound editing software
  7. If the album consists of tracks separated by periods of silence, it's probably easiest to split the wave file into individual tracks now, and deal with each track separately, but if the tracks run into one another, you will have to keep the whole side together as a unit for the next stage.
  8. What happens now is software dependent.  Some can mark or interpolate scratches (aka impulses) automatically, but usually many more normal transients than genuine flaws are marked or interpolated, so false marks overwhelm one, or automatic interpolation ruins the sound.  I only trust my ears to find scratches, and then use the Interpolate command in DCart to remove them by replacing the current selection with interpolated waveform, though care is needed in choosing start and end points for the selection, as small changes can make large differences to the replacement.  For some types of music, for example pipe music, interpolation will reduce the severity of a scratch, but still leave an appreciable knock, and for these it is necessary to replace the damaged section of waveform by copying from an identical section close to the damage.  Notwithstanding the caution above, I sometimes apply Sound Forge's Click and Crackle Removal for auto removal of vinyl 'wear'.  My method in more detail is:
    1. If you have turntable rumble, sample it from the side or track lead in or lead out, and save the sample.  For obvious reasons, this has to be done now, but is easily overlooked.
    2. Mute silent passages such as the lead in and lead out of each track or side.  Fade in and out the second immediately before and after the genuine sound.
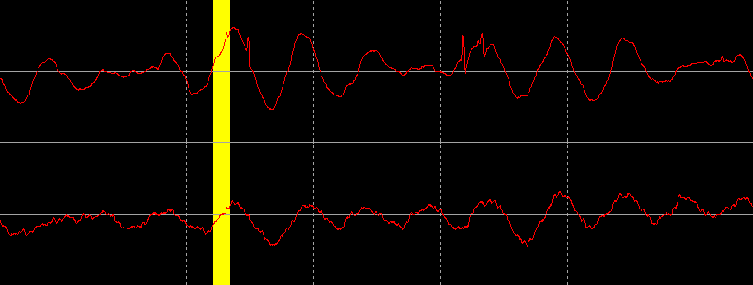
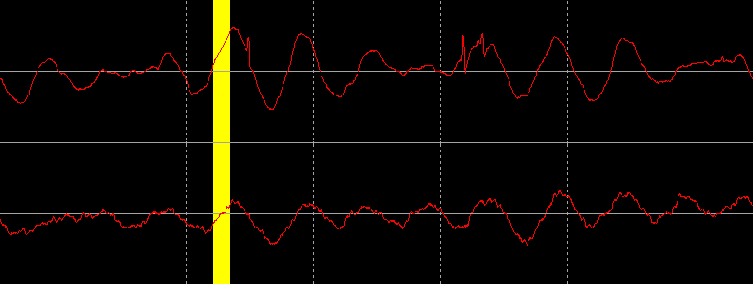
    3. Manually interpolate all the big scratches, the ones that are easy to find both aurally because they disrupt the sound unacceptably, and/or visually because their peaks stand out and perhaps cause clipping.  Here's an example from a classical guitar recording (click images to play samples):
      Before
      A vinyl waveform including a scratch loaded into digital sound editing software
      After
      A vinyl waveform including a scratch which has been removed by interpolation loaded into digital sound editing software
    4. Remove the smaller scratches.  This will be much more time consuming because they are too small to stand out visually in the waveform, the only method of finding them being aurally.  A typical procedure might be to use what programmers call a binary chop method by dropping markers to bracket the location of the scratch ever more closely:
      1. Playing back in the digital waveform editor, drop a marker the moment a blemish is heard.
      2. Drop another marker before the blemish, and play between them to check that they bracket it.
      3. Select from before the leading marker to half way between the markers and play this back.
      4. If you hear the blemish, then it lies in the first half of the marked area, so move the trailing marker onto the trailing edge of the selection, otherwise it should be in the second half of the marked area.  To check, drag the leading edge of the selection to a little beyond the trailing marker, so it becomes the trailing edge, and play this new selection.  You should hear the blemish, proving it lay in the second half of the original marked area, so drag the leading marker to lie on the leading edge of the new selection.
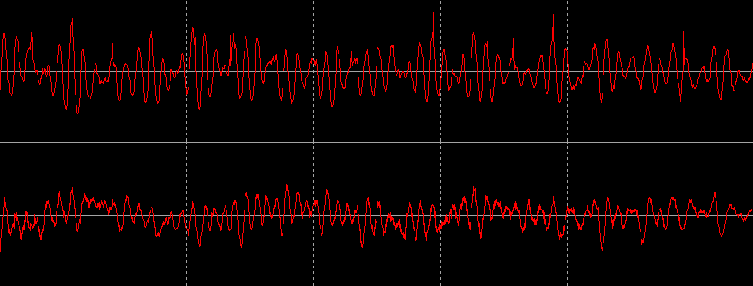
      Thus you have halved the size of the marked area.  Repeat this halving procedure until you've located the scratch visually, and fix it by whatever method of interpolation is supported by the software.  Here's an example containing a number of them close together, before and after they've been interpolated (click images to play samples):
      Before, some of the blemishes are just becoming visible at this zoom level
      A vinyl waveform including several small scratches loaded into digital sound editing software
      Detail showing one of many small blemishes selected for interpolation, and others yet to do
      A vinyl waveform including several small scratches loaded into digital sound editing software
      The same showing it interpolated (the audio demonstrates the result of interpolating them all)
      A vinyl waveform including several small scratches one of which has been removed by interpolation loaded into digital sound editing software
    5. If 'needle in the groove' noise significantly mars quieter passages, then a mild application of automatic removal might be applied.  Note that the intent here is not to completely remove all trace of such noise, as that is not likely to be possible without tearing the guts out of the sound, rather just to reduce it to an acceptable, less obtrusive, level.
    6. If turntable rumble significantly mars quieter passages, then most software can analyse the frequencies from the lead in and lead out samples that hopefully were saved earlier, and use this as a basis for a filter, which again is applied just sufficiently to reduce such noise to an acceptable, less obtrusive, level.
  9. If you haven't already, split the CD into tracks.  With recordings where individual tracks run into each other seamlessly when playing from start to finish, this will only happen on CD if track boundaries coincide with sector boundaries, and either your wave editing or your burning software must be able to arrange this for you.  In DCart, you select where the track boundaries should ideally go using markers, then choose CD-Prep, Quantize for CD Audio, whereupon the software adjusts the markers to lie on the nearest boundary, and then you split the file into tracks.  Other software will doubtless be different in its behaviour.
  10. Burn a CD-RW.  Check that besides playing from start to finish correctly, the tracks start and end at the expected locations in the music, and that random choice of tracks works.
  11. Burn a CD-R.  Check that besides playing from start to finish correctly, random choice of tracks works, the latter being a test of a good burn.  Failure of this test may be a sign of poor quality CD-Rs